Kitchener Stitch for joining stocking stitch
Thread a tapestry needle with a length of yarn about 3 times the width of your work. Have the two sets of stitches you want to join on separate needles. You should have the same number of stitches on each needle. Hold them parallel, with the wrong sides of the work together. (I personally like to lay the work flat on a table, and hold the needles together only at the tips when I'm joining. This way I can check my tension frequently on the flat surface).
To start: Thread the needle through the first stitch on the front needle as if to purl, pull yarn through, (leaving a tail to weave in, unless you're using the working yarn from the live stitches). Leave stitch on needle. Thread the needle through the first stitch on the back needle as if to knit. Leave stitch on needle.
- Thread needle through first stitch on front needle as if to knit. Slip stitch off needle.
- Thread needle through next stitch on front needle as if to purl. Leave stitch on needle.
- Thread needle through first stitch on back needle as if to purl. Slip stitch off needle.
- Thread needle through next stitch on back needle as if to knit. Leave stitch on needle.
Repeat these 4 steps. Don't pull the yarn too tightly. Every few stitches, check the tension of your Kitchener stitches. Adjust the tension using the tip of your tapestry needle to pull the new stitches; easiest if you work from right to left.
A lot of people recommend chanting as you go. My mantra is "Front-Knit-OFF, Front-Purl-ON, Back-Purl-OFF, Back-Knit-ON", although others recommend "Knit, purl, purl, knit". You will find your own groove.
Kitchener Stitch for Rib?
This is where grafting is problematic. If you've ever tried to join any kind of ribbing (k1p1, k2p2 etc) with Kitchener stitch you found that the columns of stitches, when grafted, don't line up perfectly. They stagger a half-stitch, and it looks weird. (On wide ribs, like k4p4 you can probably get away with it). This happens when you graft stocking stitch too, but it's not noticeable.
To graft ribbing, you need to separate the knit stitches on to one needle, and the purls on to another. Do this with both sets of live stitches. (You'll have 4 needles). Arrange your needles so the purl sts are at the back. Ignore the purl needles, and graft the knit stitches the way you would for stocking stitch. When you are done with the knits, flip everything over, and graft the purl stitches (which now look like knits, because you flipped everything over). Be careful with your tension, this method of grafting is not elastic like the ribbing itself.
More Advanced (But Not Really) Kitchener Stitch for joining seed (moss) stitch
Using Kitchener Stitch for textured knits like seed stitch is harder to find instructions for. But it's really not that different than regular Kitchener stitch. What makes a Kitchener Stitch looks like knit and not purl? Like knitting, it's all in the direction and layering.
To alternate knit and purl with Kitchener stitch, starting with a knit stitch:
Start the same as usual: Thread needle through front as if to purl. Leave on. Through back as if to knit. Leave on.
- Through front (knit stitch) as if to knit. Slip off.
- Through front (purl stitch) as if to knit. Leave on.
- Through back (knit stitch) as if to purl. Slip off.
- Through back (purl stitch) as if to purl. Leave on.
- Through front (purl stitch) as if to purl. Slip off.
- Through front (knit stitch) as if to purl. Leave on.
- Through back (purl stitch) as if to knit. Slip off.
- Through back (knit stitch) as if to knit. Leave on.
Repeat these 8 steps. There will be a half-stitch stagger (see the section above re Kitchener for ribbing) but it will be camouflaged by the bumpiness of the seed stitch.
Useful web pages for Kitchener Stitch guidance
An excellent article with instructions and pictures from Knitty
An alternate method from TechKnitter with illustrations
And, if you like to learn from videos, here's a video tutorial at Knitting Help
If you happen to have Interweave Spring 2010, check out TechKnitter's detailed article on Kitchener Stitch!
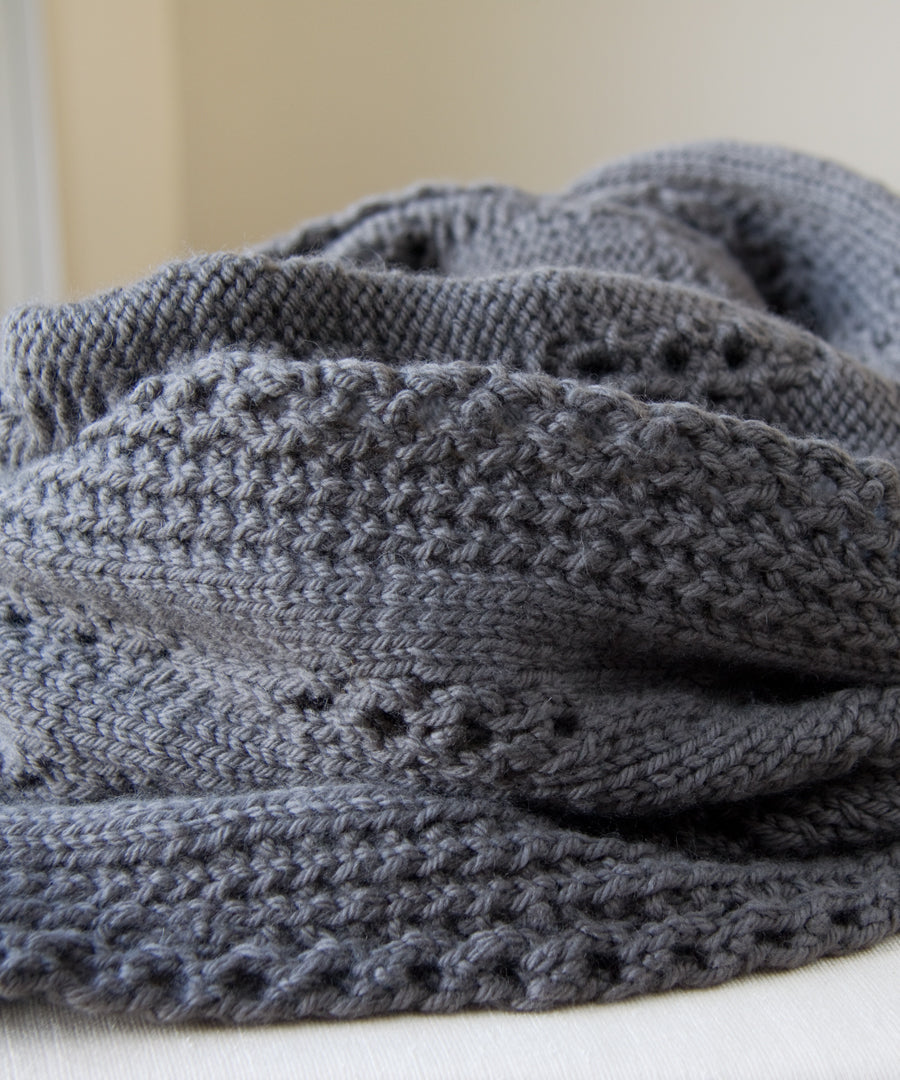
The Chandelle Cowl (above) is worked as a long strip then grafted into a loop using Kitchener Stitch."