If you've looked at any top-down shawl patterns, you have probably seen the "garter stitch tab". I didn't include one in the Oaklet Shawl pattern, because I wanted the shawl to be doable by a beginner knitter. But it's a handy technique, and once you get past its trickiness, it adds a lovely seamless border to the top of your shawl. In this article, I've included a photo of the tab in a shawl, and instructions on how to make a tab, with a diagram.
For a full step by step tutorial on using a garter stitch tab to start a shawl, see Triangular Shawls Step by step guide with 2 patterns.
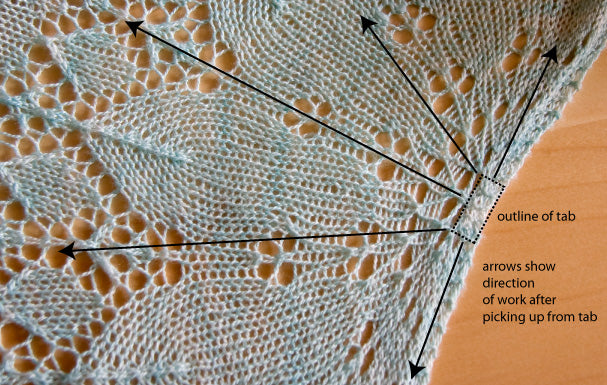
You make a small rectangle in garter stitch, then pick up stitches along its side and cast on edge. This rectangle then forms a border at the starting edge of your top-down shawl. This garter stitch border is then worked throughout the shawl at the beginning and edge of each row.
The photo at the top shows the tab in action.
To make a garter stitch tab (in this example, I'm using a 3 stitch wide tab, and want to end up with 9 stitches for my first row of the shawl):
Cast on 3 sts. (You can use a regular or provisional cast on. Provisional makes the tab blend in a little more, but the tab is such a small part of the shawl, I don't find that it makes a lot of visible difference. The above example was done using a regular cast on).
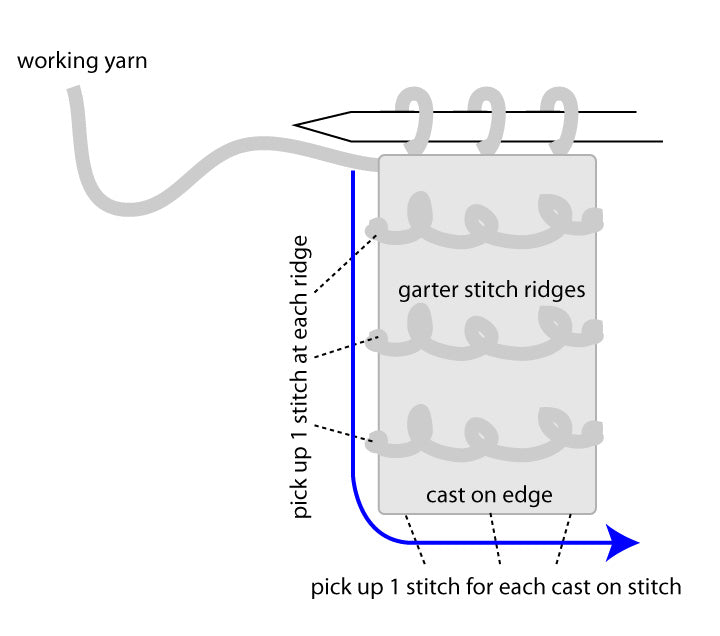
Knit 7 rows, do not turn work. Pick up 3 and knit stitches along left side of work (one stitch per garter stitch ridge)—you now have 6 stitches.
Pick up and knit 3 stitches along cast on edge. (If you used a provisional cast on, transfer your cast on stitches to the left needle, and knit across them)—you now have 9 stitches. Your next row is a WS row.
Here's a diagram (the blue arrow shows the direction of picking up):